ⓒ
Copyright PAKOC https://pakoc.netHello! Today’s recipe is a pork neck kimchi fried rice recipe made using only relatively cheap pork neck. For those who thought that salty Spam is the best for kimchi fried rice, you’ll find this version very satisfying! It’s a taste that is somewhat mild yet savory enough for everyone to enjoy! Let’s find out what the recipe is like?!
Introduction to Pork Neck Kimchi Fried Rice Ingredients
First, I prepared 200g of pork neck for two servings! Honestly, this might feel a bit much. But isn’t it better to have more meat? It’s good to let the pork neck sit at room temperature for a while before cooking it.
ⓒ
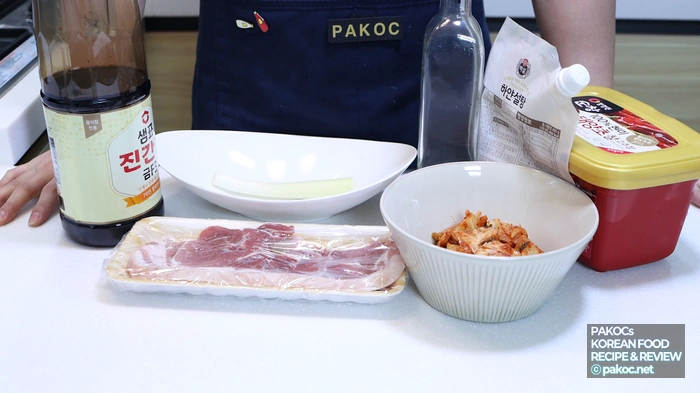
Copyright PAKOC https://pakoc.net[Pork Neck Kimchi Fried Rice for 2 Servings]
- 2 servings of rice (equivalent to 2-3 packs of instant rice)
- 1 cup of kimchi (180ml)
- 200g of pork neck
- 1 stalk of green onion
- 0.5-1 tablespoon of oyster sauce, 1 teaspoon of soy sauce
- 1-2 tablespoons of kimchi juice or gochujang
- 0.5 tablespoon of red pepper powder, 1 tablespoon of sugar
- A pinch of salt and pepper, 2-3 tablespoons of cooking oil
- 2 eggs (optional), a bit of roasted sesame seeds (optional)
- A bit of seaweed flakes (optional), 0.5 tablespoon of butter (optional)
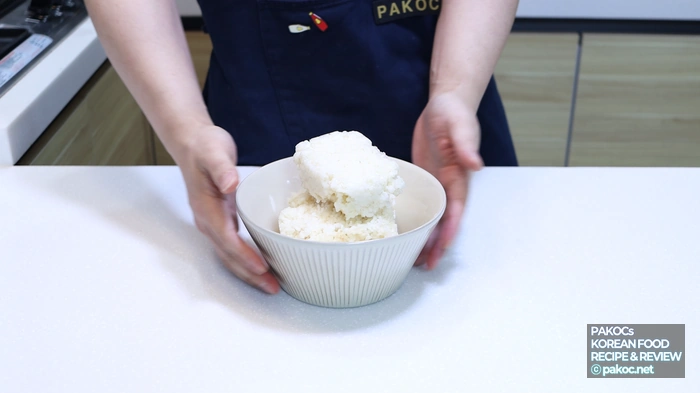
For fried rice, it’s good to use slightly thawed frozen rice or cold rice that’s a bit firm… but you can prepare it to your liking.
ⓒ
Copyright PAKOC https://pakoc.netPork Neck Kimchi Fried Rice Recipe Summary
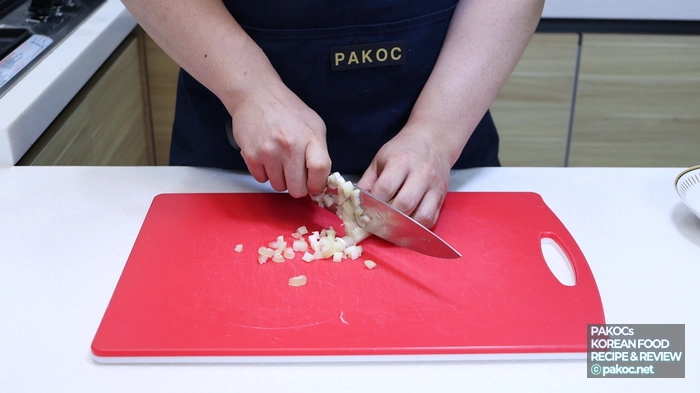
- Finely chop the kimchi and green onion.
- In a suitable frying pan, add 1 tablespoon of cooking oil and heat over medium heat, then cook the pork neck. Season lightly with salt and pepper while cooking.
- Chop the cooked pork neck into small pieces, return to the pan, add an additional tablespoon of cooking oil, and fry until golden brown.
- Add the chopped green onion and stir-fry to release the green onion oil.
- Add the kimchi to the cooked meat and green onion, and stir-fry. Add 1 tablespoon of sugar to balance the sourness.
- Add 1 tablespoon of soy sauce and 0.5 tablespoon of red pepper powder to one side of the pan, slightly burn it, then mix well with the ingredients.
- Add rice, 1-2 tablespoons of gochujang, and 0.5 tablespoon of oyster sauce to the ingredients, mix well while stir-frying, and adjust the seasoning with oyster sauce.
- Top the finished fried rice with a fried egg, roasted sesame seeds, seaweed flakes, or butter according to your preference.
🥗 Ingredient Preparation Time: 10 minutes
🍳 Cooking Time: 15 minutes
Pork Neck Kimchi Fried Rice Ingredient Preparation
For ingredient preparation, just prepare the green onion and kimchi. I chopped them as finely as possible to focus on the meat texture! Prepare them to your liking.
ⓒ
Copyright PAKOC https://pakoc.net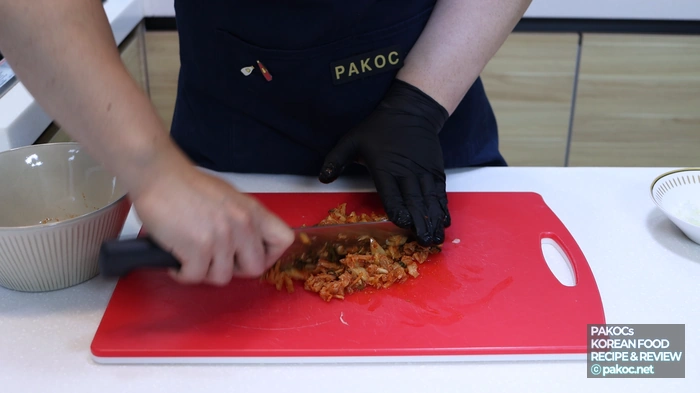
ⓒ
Copyright PAKOC https://pakoc.netCooking Pork Neck Kimchi Fried Rice
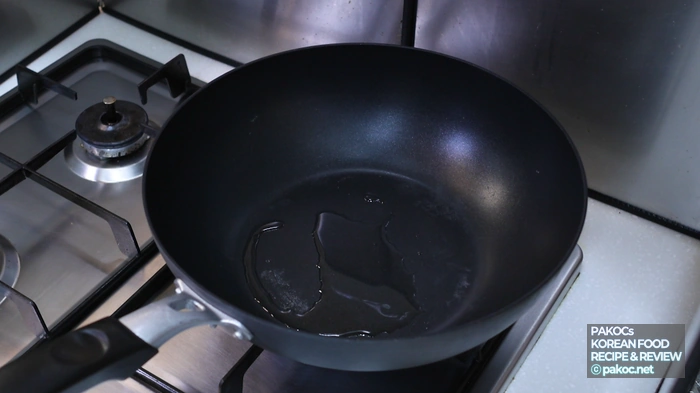
Prepare a sufficiently wide pan. Since we’ll be making kimchi fried rice right after cooking the meat, it’s good to have a pan that’s convenient for one-pan cooking. Add 1-2 tablespoons of cooking oil! Heat it up on high heat.
ⓒ
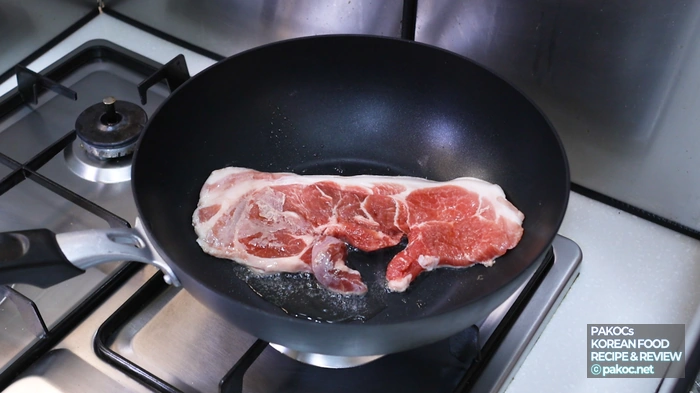
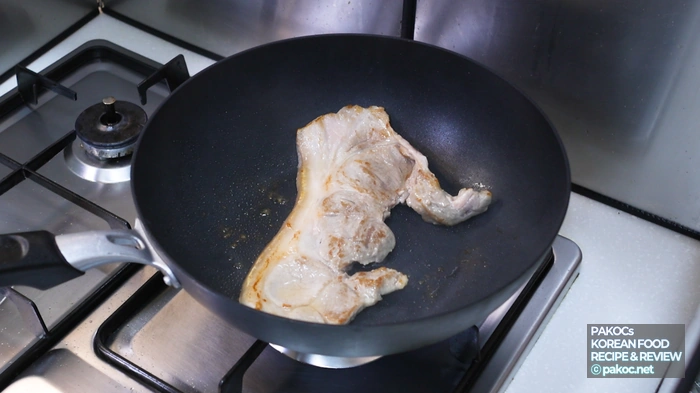
Copyright PAKOC https://pakoc.netOops, don’t forget to lightly wipe the moisture off the surface of the pork neck that was left at room temperature! Once the cooking oil is sufficiently heated, cook the pork neck thoroughly.
ⓒ
Copyright PAKOC https://pakoc.net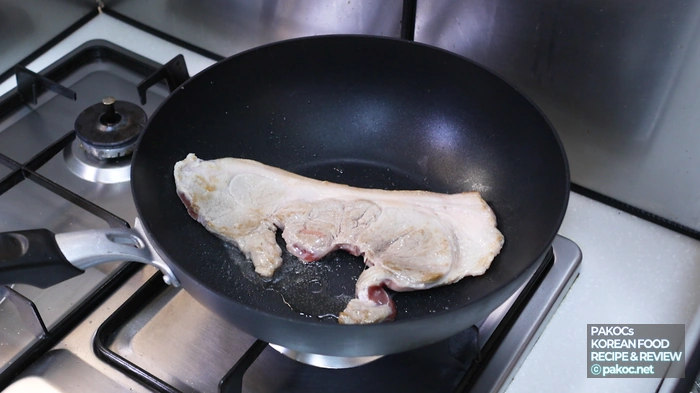
ⓒ
Copyright PAKOC https://pakoc.netWhen cooking the pork neck, it’s good to cook it thoroughly on the outside! You don’t need to cook it all the way through. Once cooked, cut the meat into bite-sized pieces, and we’ll use the oil in the pan as is.
ⓒ
Copyright PAKOC https://pakoc.net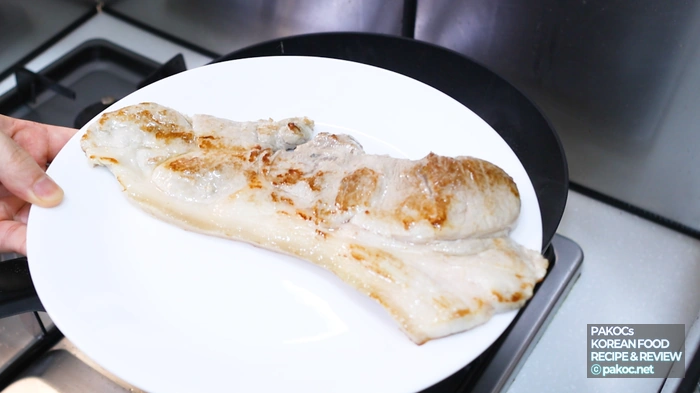
ⓒ
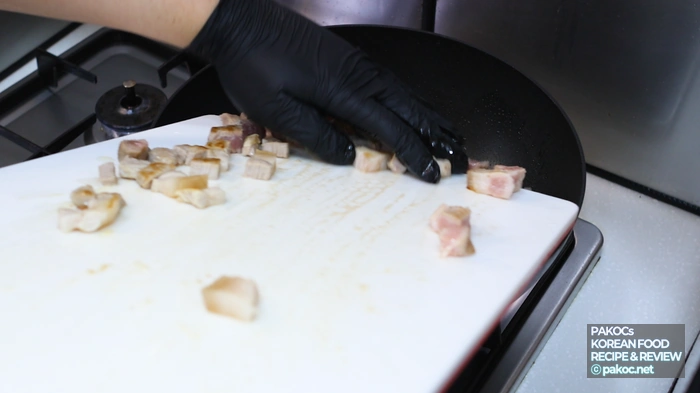
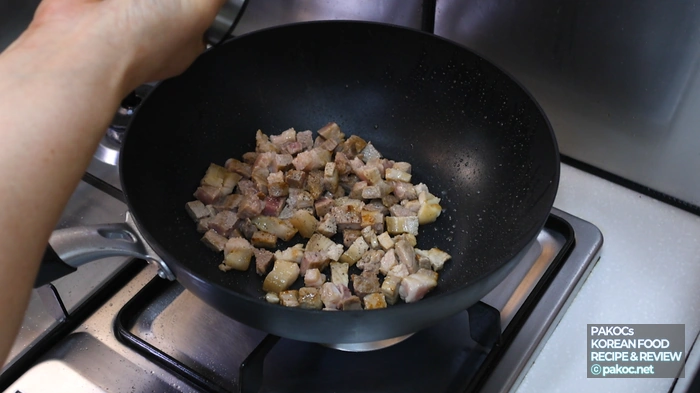
Copyright PAKOC https://pakoc.netReturn the bite-sized pork pieces to the pan. I cut them into slightly larger pieces! This size should be good for enjoying the meat texture. You can also add the green onion first and stir-fry to release the green onion oil before adding the pork.
ⓒ
Copyright PAKOC https://pakoc.netLightly season the pork with salt and pepper, and cook it thoroughly once more. The more thoroughly the pork is cooked, the better the taste will be.
ⓒ
Copyright PAKOC https://pakoc.net
ⓒ
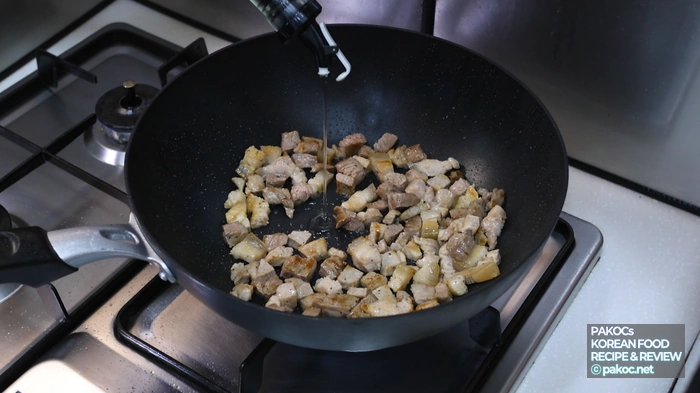
Copyright PAKOC https://pakoc.netAfter stir-frying the pork, adjust the heat to medium. If the oil seems a bit lacking, add 1-2 tablespoons of cooking oil and add the chopped kimchi!
ⓒ
Copyright PAKOC https://pakoc.net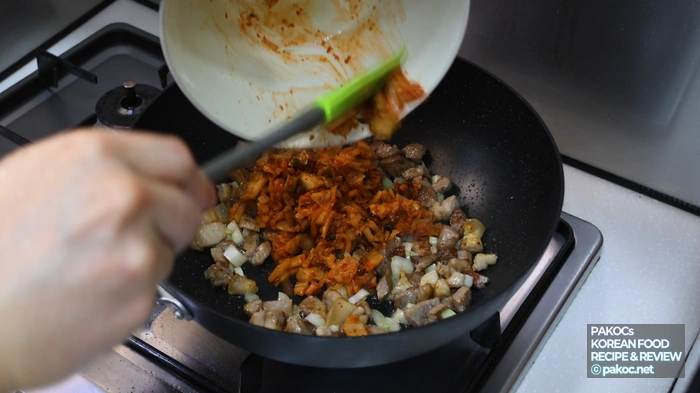
ⓒ
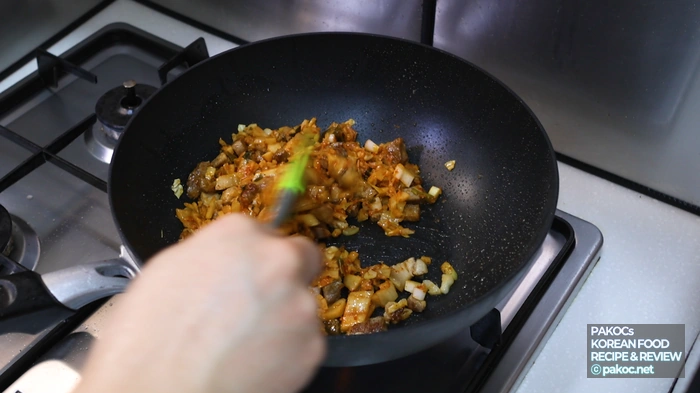
Copyright PAKOC https://pakoc.netAfter adding the kimchi, mix it lightly with the meat, and add 1 tablespoon of sugar depending on the sourness of the kimchi.
ⓒ
Copyright PAKOC https://pakoc.net
ⓒ
Copyright PAKOC https://pakoc.netMix the added sugar well with the kimchi and pork! Once the kimchi is cooked, push it to one side!

ⓒ
Copyright PAKOC https://pakoc.net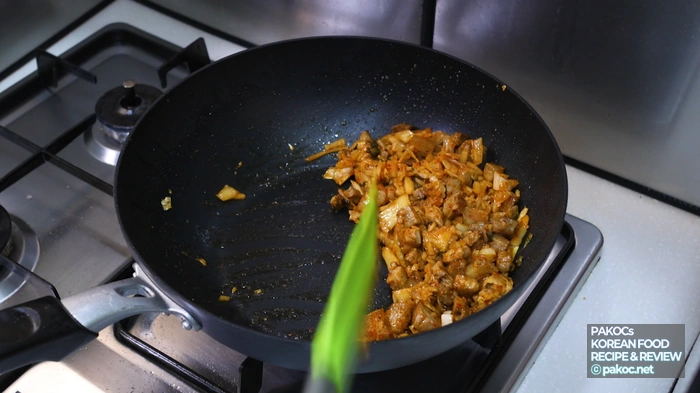
ⓒ
Copyright PAKOC https://pakoc.netTurn the heat up slightly to high, add 1 tablespoon of soy sauce and 0.5 tablespoon of red pepper powder, and slightly burn it to create a smoky flavor, then mix well with the kimchi and pork.

ⓒ
Copyright PAKOC https://pakoc.net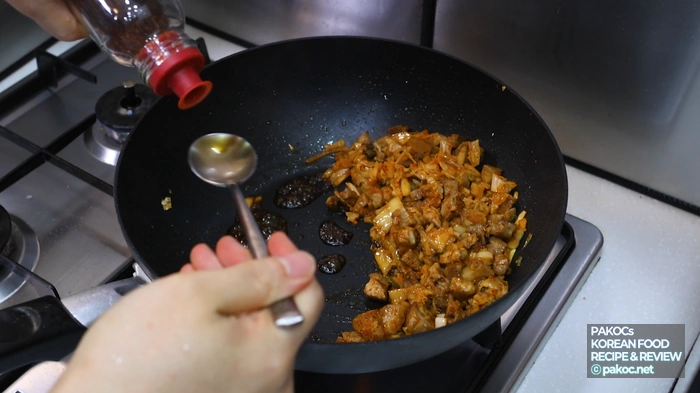
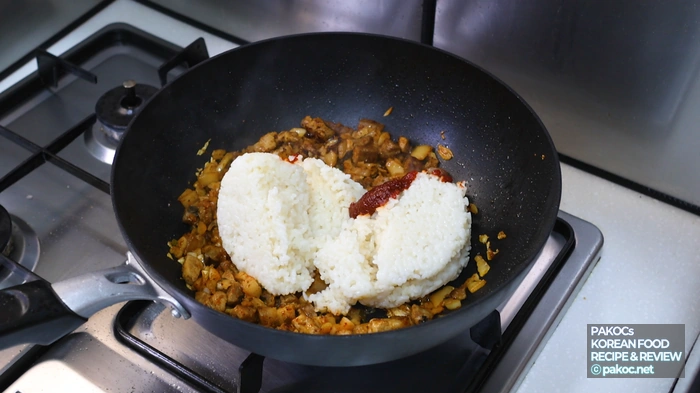
ⓒ
Copyright PAKOC https://pakoc.netTurn the heat back to medium, and add rice, 1-2 tablespoons of gochujang, and 0.5 tablespoon of oyster sauce!
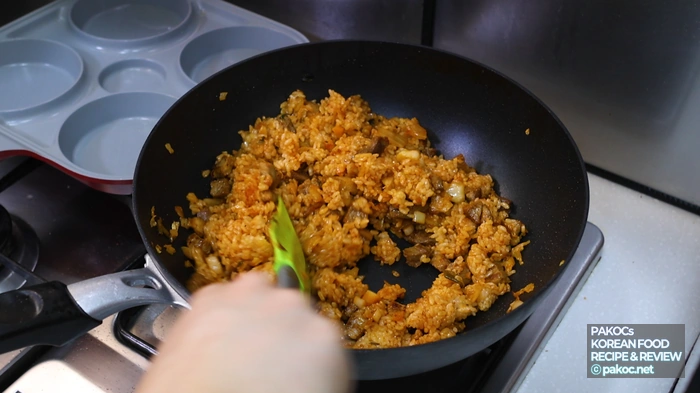
ⓒ
Copyright PAKOC https://pakoc.netNow, mix evenly over low heat while cooking. The slightly savory taste of gochujang will enhance the flavor! While mixing the rice at the end, prepare a fried egg for an even better experience.
ⓒ
Copyright PAKOC https://pakoc.net
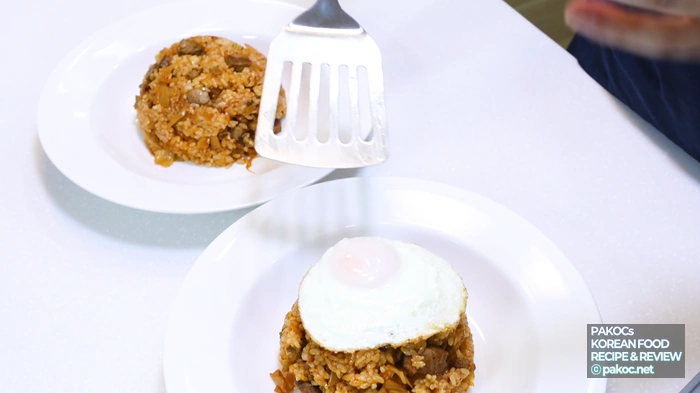
ⓒ
Copyright PAKOC https://pakoc.netPlace the finished kimchi fried rice in a serving bowl! I like to press it into a rice bowl and then transfer it to a wide dish, but feel free to serve it however you like.

ⓒ
Copyright PAKOC https://pakoc.net
ⓒ
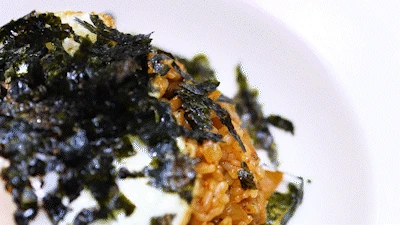
Copyright PAKOC https://pakoc.netTop with a fried egg, sprinkle some seaweed flakes, and finish. Depending on your preference, you can also finish with just roasted sesame seeds. If you want a slightly nutty flavor, I recommend placing a piece of butter between the egg and rice.
ⓒ
Copyright PAKOC https://pakoc.net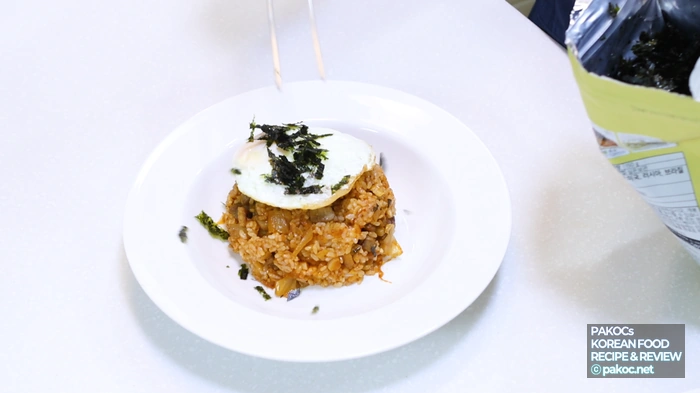
ⓒ
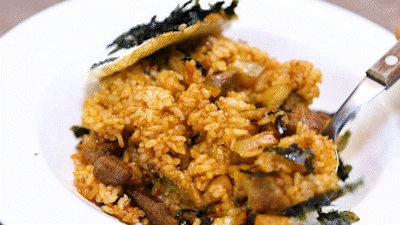
Copyright PAKOC https://pakoc.netFinish according to your preference! Even just eating the kimchi fried rice alone is quite tasty, so enjoy it however you like.
ⓒ
Copyright PAKOC https://pakoc.netPork Neck Kimchi Fried Rice Completion Gallery

ⓒ
Copyright PAKOC https://pakoc.net


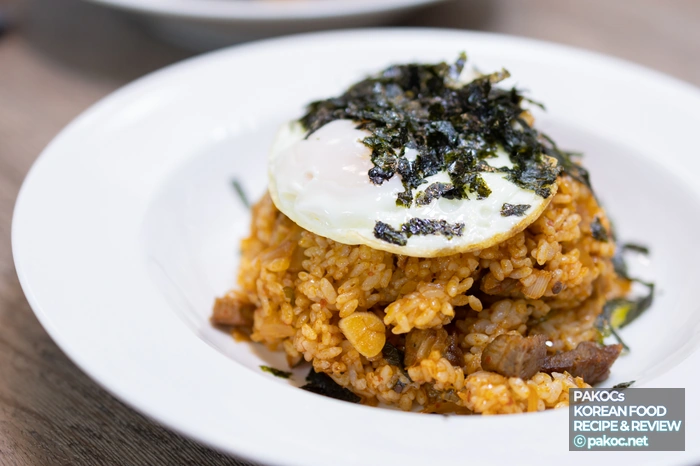
Pork Neck Kimchi Fried Rice Completion
So here is the completed pork neck kimchi fried rice. As mentioned, it’s nice to enjoy it with a slightly mild taste when made with pork neck instead of Spam, but this style is also really good!

ⓒ
Copyright PAKOC https://pakoc.net
ⓒ
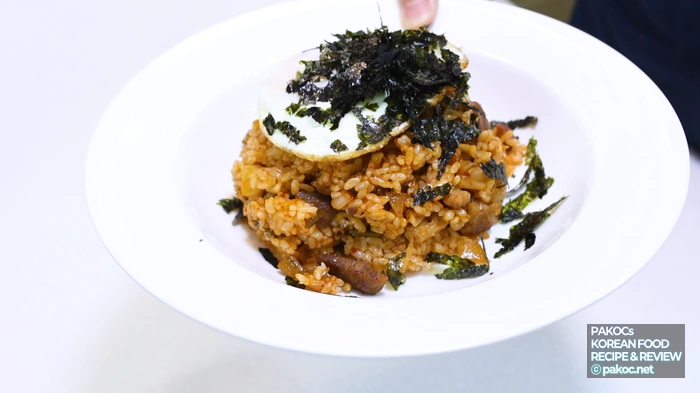
Copyright PAKOC https://pakoc.netYou can adjust the slightly salty umami flavor with gochujang, and add various toppings according to your preference for an even more delicious experience.
ⓒ
Copyright PAKOC https://pakoc.net
ⓒ
Copyright PAKOC https://pakoc.netThe pork neck is large enough to enjoy the meat texture! If you have other good toppings besides egg, butter, seaweed flakes, and roasted sesame seeds, please share them in the comments! 😊
ⓒ
Copyright PAKOC https://pakoc.net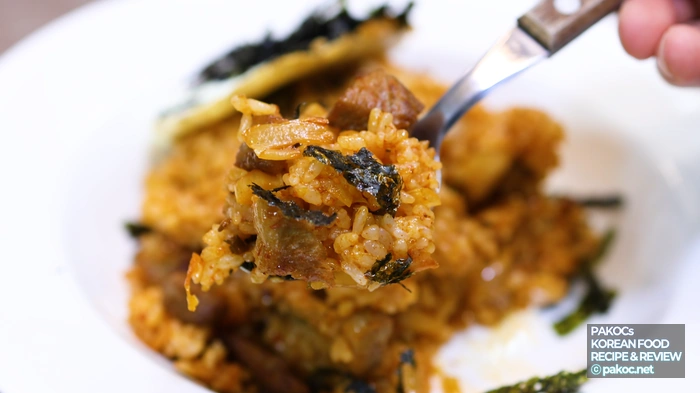
ⓒ
Copyright PAKOC https://pakoc.netIt’s really simple, but how about this delicious pork neck kimchi fried rice!? It’s easy to make and tastes great, making it perfect for a weekend meal. It’s a taste you won’t regret.

ⓒ
Copyright PAKOC https://pakoc.netYouTube Video
image sources
- 맛있는 식사 완성 과정: Copyright PAKOC https://pakoc.net
- 맛있는 한끼 요리 사진: Copyright PAKOC https://pakoc.net
- 식사 플레이팅 완성 사진: Copyright PAKOC https://pakoc.net
- 맛과 색깔 조화 사진: Copyright PAKOC https://pakoc.net
- 한입 크기 잘라진 모습: Copyright PAKOC https://pakoc.net
- 부드러운 식감 사진: Copyright PAKOC https://pakoc.net
- 다양한 토핑 사진: Copyright PAKOC https://pakoc.net
- 편리한 요리 방법 사진: Copyright PAKOC https://pakoc.net
- 김치볶음밥 재미 사진: Copyright PAKOC https://pakoc.net
- 이색적인 한끼 요리 사진: Copyright PAKOC https://pakoc.net
- 맛있는 돼지목살 김치볶음밥 완성사진: Copyright PAKOC https://pakoc.net
- 담백한 김치볶음밥 레시피 소개: Copyright PAKOC https://pakoc.net
- 김치볶음밥 재료 준비 과정: Copyright PAKOC https://pakoc.net
- 구워진 돼지목살 사진 전시: Copyright PAKOC https://pakoc.net
- 고소한 볶은참깨 토핑 사진: Copyright PAKOC https://pakoc.net
- 식용유 가열하는 과정 사진: Copyright PAKOC https://pakoc.net
- 대파 썰어놓은 사진 전시: Copyright PAKOC https://pakoc.net
- 맛있게 구워진 목살 사진: Copyright PAKOC https://pakoc.net
- 볶아진 대파 김치볶음밥 사진: Copyright PAKOC https://pakoc.net
- 담백한 맛 김치볶음밥: Copyright PAKOC https://pakoc.net
- 짭조름한 감칠맛 사진: Copyright PAKOC https://pakoc.net
- 김치 잘게 썰어놓은 사진: Copyright PAKOC https://pakoc.net
- 소금과 후추 뿌리는 사진: Copyright PAKOC https://pakoc.net
- 김가루 올린 볶음밥 사진: Copyright PAKOC https://pakoc.net
- 뚝배기에 담긴 볶음밥 사진: Copyright PAKOC https://pakoc.net
- 프라이팬 예열하는 사진: Copyright PAKOC https://pakoc.net
- 간장 넣는 과정 사진: Copyright PAKOC https://pakoc.net
- 고추장 양념 사진: Copyright PAKOC https://pakoc.net
- 볶음밥 완성 상태 사진: Copyright PAKOC https://pakoc.net
- 제철 김치 사진 전시: Copyright PAKOC https://pakoc.net
- 계란 노른자 완벽한 사진: Copyright PAKOC https://pakoc.net
- 푸짐한 한그릇 식사 사진: Copyright PAKOC https://pakoc.net
- 비주얼 좋은 김치볶음밥 사진: Copyright PAKOC https://pakoc.net
- 살짝 태운 고춧가루 사진: Copyright PAKOC https://pakoc.net
- 저녁 식사 추천 사진: Copyright PAKOC https://pakoc.net
- 부드러운 버터 토핑 사진: Copyright PAKOC https://pakoc.net


