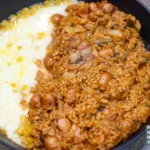
Hello! Today’s recipe is Tender Beef Jangjorim, a Korean soy-braised beef side dish. Jangjorim is a favorite with grown-ups and kids alike, a hearty, sweet-and-salty banchan that’s a true rice-stealer. This time I set out to recreate that signature soft, tender jangjorim texture at home. The key is adding Korean pear for a sweet, savory depth, and shredding the brisket fine for a melt-in-your-mouth softness. So shall we take a look at the recipe?
📋 At a Glance
- Dish: Tender Beef Jangjorim (soy-braised beef)
- Category: Korean side dish (soy-braised)
- Main ingredients: 500 g beef brisket, 200 g peeled quail eggs, Korean pear, shishito peppers (optional)
- Seasoning: dark soy sauce, soup soy sauce, sugar, cooking wine, oligo syrup, cooking water
- Equipment: a pot, a mesh stock bag, a rolling pin (to tenderize)
- Time: about 2 hr prep (soaking + simmering) + 20–30 min cooking
- Difficulty: Moderate
- Tips: pear for savory depth, and shred the brisket fine before it fully cools for a soft, tender texture!
Tender Beef Jangjorim: The Ingredients
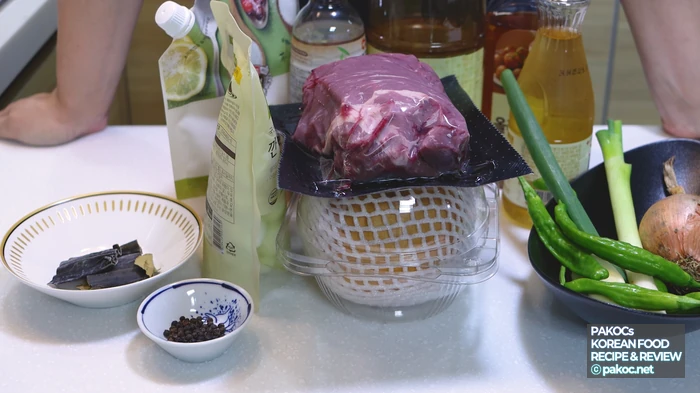
At its core, this dish simmers beef brisket to make a stock, then braises the meat and quail eggs in that stock with seasoning. Adding pear brings out a sweet, savory depth and makes the beef even more tender. A soft-style jangjorim like this is usually very mild with almost no heat, but it can taste a touch plain made at home, so add shishito peppers to taste!
ⓒ
Copyright PAKOC https://pakoc.net | All Rights Reserved Pakoc(http://Pakoc.net)[Tender Beef Jangjorim, base ingredients]
- 500 g beef brisket
- 200 g peeled quail eggs
- 1 L water (clean bottled or filtered)
- 1/2 stalk of green onion
- 8 peeled garlic cloves
- 1/2 onion
- 1 Korean pear
- 3 bay leaves
- 2 pieces of dried kelp
- 1/2 Tbsp whole peppercorns
- 5 shishito peppers (optional)
[Tender Beef Jangjorim, seasoning]
- 10 Tbsp dark soy sauce (200 ml)
- 2 Tbsp soup soy sauce
- 3 Tbsp sugar
- 3 Tbsp cooking wine
- 3 Tbsp oligo syrup
- 3 Tbsp cooking water
[Tender Beef Jangjorim recipe at a glance]
- Soak 500 g beef brisket in cold water to draw out the blood, about 1 hour, or 30 minutes if you’re in a hurry.
- Rinse 1/2 stalk green onion, 8 garlic cloves, 1/2 onion, and 5 shishito peppers (optional), and quarter 1 pear.
- Put the green onion, garlic, onion, 3 bay leaves, and 1/2 Tbsp peppercorns in a mesh bag, then add it to a pot with the pear, the soaked brisket, and 2 pieces of kelp, pour in 1 L water, and bring to a boil over high heat.
- Once it starts boiling, remove the kelp and skim off the foam. Lower to medium heat and simmer with the lid slightly ajar for 40 min to 1 hour.
- Strain the finished broth and keep just the liquid. If it’s short, top up with water to make 1 L!
- Shred the brisket as fine as possible. Press the meat with a rolling pin to make it as tender as you can.
- Add the shishito peppers (optional), shredded beef, 200 g peeled quail eggs, and the broth all to the pot.
- Add 10 Tbsp dark soy sauce, 2 Tbsp soup soy sauce, 3 Tbsp sugar, 3 Tbsp cooking wine, 3 Tbsp oligo syrup, and 3 Tbsp cooking water, then boil over high heat.
- Once the seasoning comes to a boil, lower to medium-low and simmer for another 20–30 minutes.
🥩 Shred the beef before it fully cools! It’s hard to shred once it’s too cold.
🥩 If you’re worried about noise for downstairs neighbors while shredding the brisket, a rolling pin is your friend.
🥘 If it boils over, put the lid on!
🥘 Prep time: 2 hours (including draining the blood + simmering the beef)
🍳 Cook time: about 20–30 min
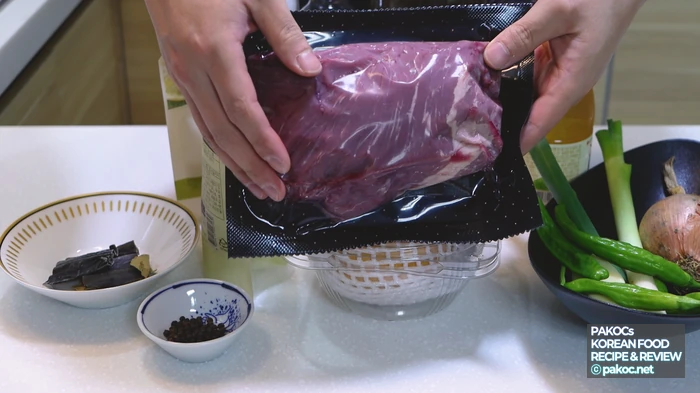
ⓒ
Copyright PAKOC https://pakoc.net | All Rights Reserved Pakoc(http://Pakoc.net)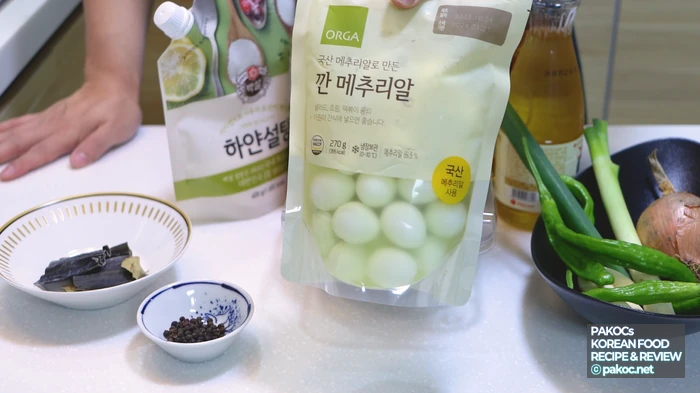
ⓒ
Copyright PAKOC https://pakoc.net | All Rights Reserved Pakoc(http://Pakoc.net)Adding pear gives a lovely sweet, savory depth! If you don’t have one, pear juice or a pear drink works too, just keep in mind it’ll turn out that much sweeter. A soft jangjorim like this is normally very mild, so shishito peppers aren’t traditionally included, but a homemade batch can feel a little plain. The peppers are strictly optional, so add them to taste!
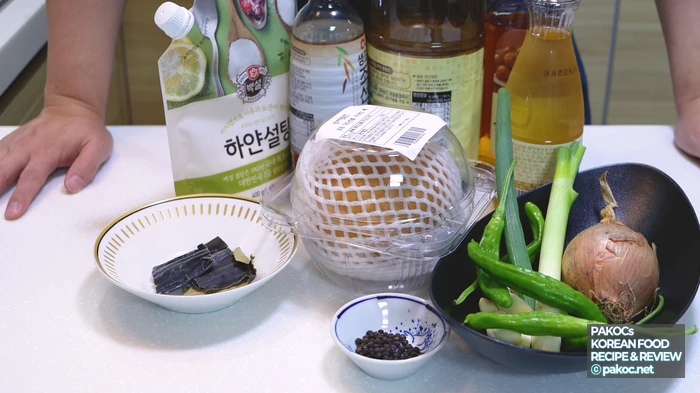
ⓒ
Copyright PAKOC https://pakoc.net | All Rights Reserved Pakoc(http://Pakoc.net)Prepping the Ingredients
Let’s get the prep going. First, cut the 500 g brisket into pieces good for simmering. Too big and it’s awkward to shred later; too small and it cooks through too fast, so aim for a moderate size. I cut mine a touch on the large side. Place it in a pot with clean bottled or filtered water and just let it soak.
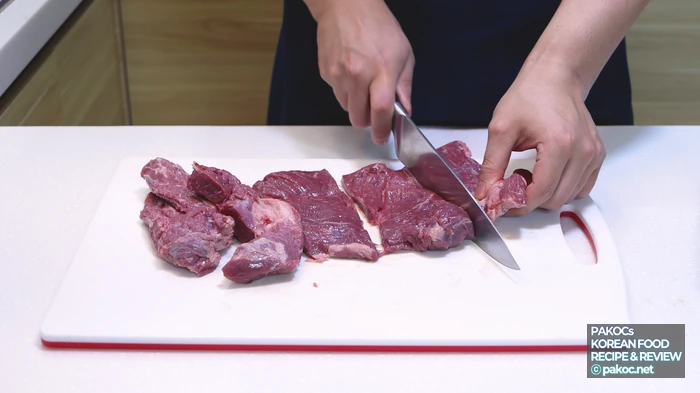
ⓒ
Copyright PAKOC https://pakoc.net | All Rights Reserved Pakoc(http://Pakoc.net)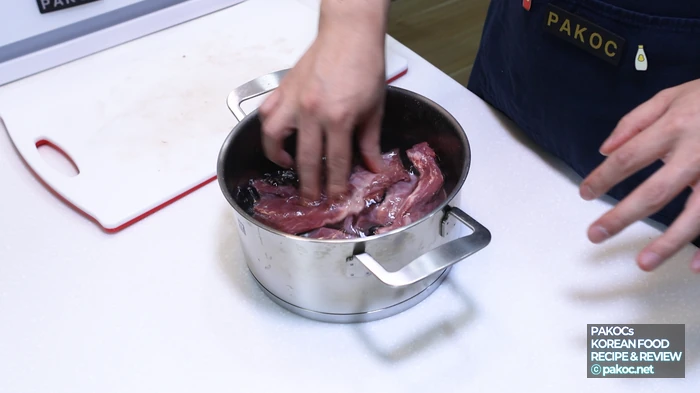
ⓒ
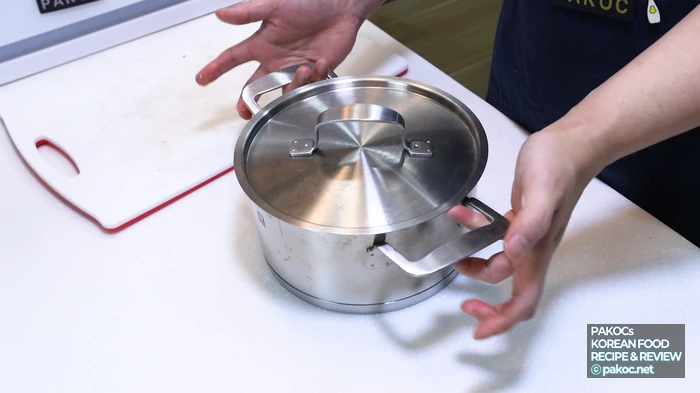
Copyright PAKOC https://pakoc.net | All Rights Reserved Pakoc(http://Pakoc.net)Let it soak to draw out the blood. About 1 hour is usually plenty, or 30 minutes if you’re pressed for time! Even if a little blood remains, you can just skim off the foam that rises as it cooks later.
ⓒ
Copyright PAKOC https://pakoc.net | All Rights Reserved Pakoc(http://Pakoc.net)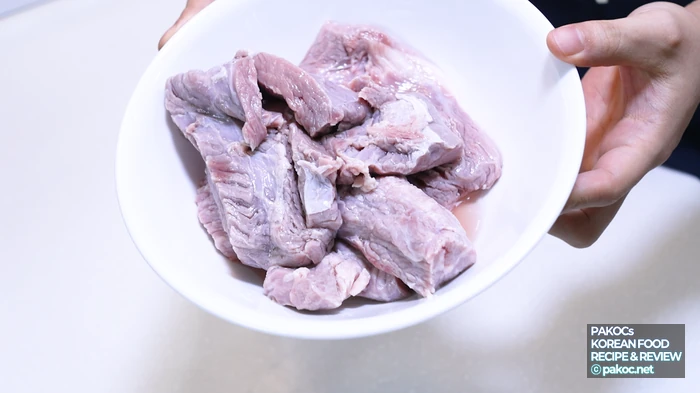
ⓒ
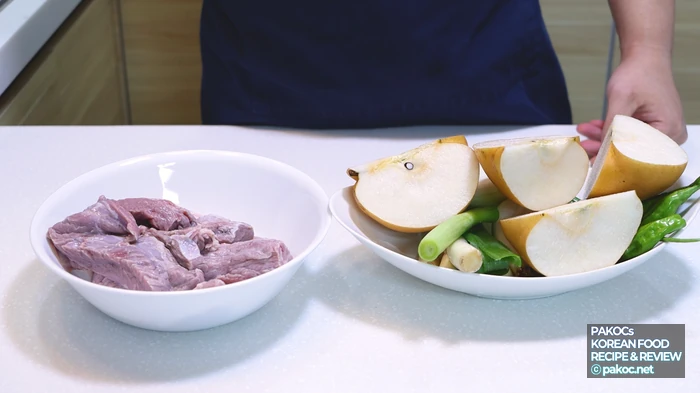
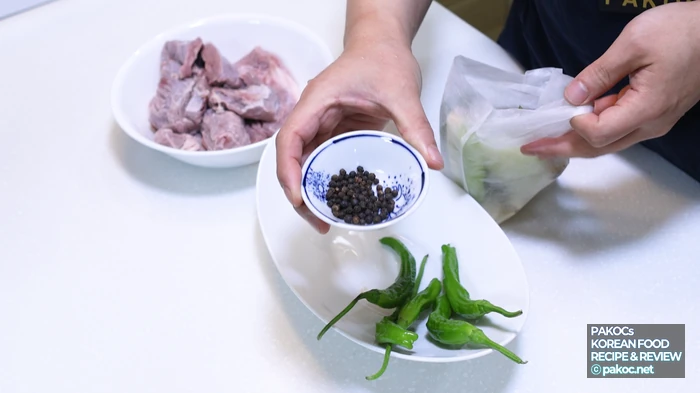
Copyright PAKOC https://pakoc.net | All Rights Reserved Pakoc(http://Pakoc.net)While the blood drains, prep 1/2 stalk green onion, 8–10 garlic cloves, 1/2 onion, 1 pear, and 5 shishito peppers, rinsing them clean. Cut them to fit the size of your pot.
ⓒ
Copyright PAKOC https://pakoc.net | All Rights Reserved Pakoc(http://Pakoc.net)Add the prepped items to the pot in order, and tuck the small bits like green onion, garlic, and onion, along with 3 bay leaves and 1/2 Tbsp peppercorns, into a mesh bag so they’re easy to fish out later. Add 2 pieces of kelp to the pot as well, pour in 1 L of water, and you’re set!
ⓒ
Copyright PAKOC https://pakoc.net | All Rights Reserved Pakoc(http://Pakoc.net)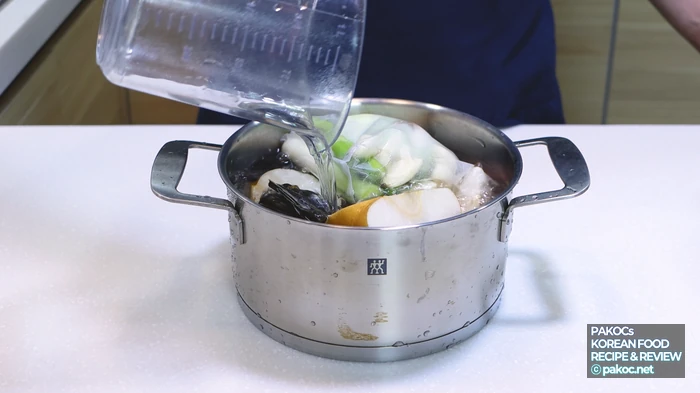
ⓒ
Copyright PAKOC https://pakoc.net | All Rights Reserved Pakoc(http://Pakoc.net)Making the Tender Beef Jangjorim
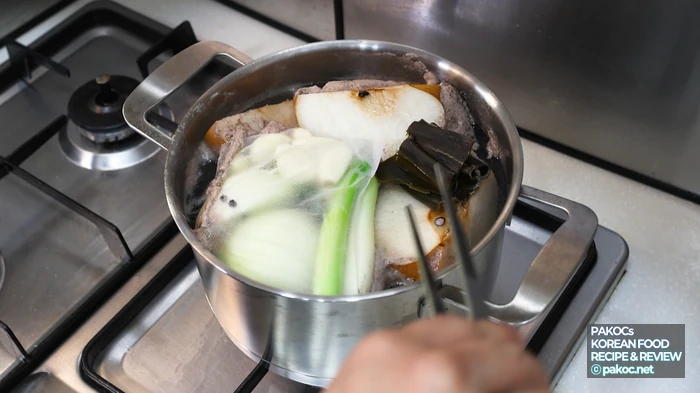
Start bringing everything to a boil over high heat with the lid off. Once the water starts boiling, lower to medium heat!
ⓒ
Copyright PAKOC https://pakoc.net | All Rights Reserved Pakoc(http://Pakoc.net)Remove the kelp first, and skim the foam that rises over the ingredients as needed. Keep it at medium heat! Simmer with the lid slightly ajar for 40 min to 1 hour.
ⓒ
Copyright PAKOC https://pakoc.net | All Rights Reserved Pakoc(http://Pakoc.net)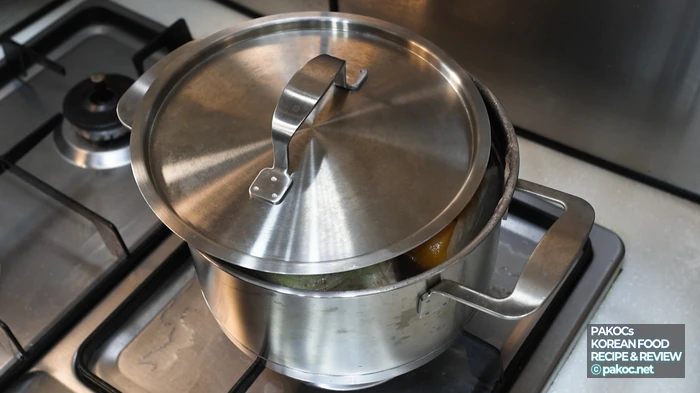
ⓒ
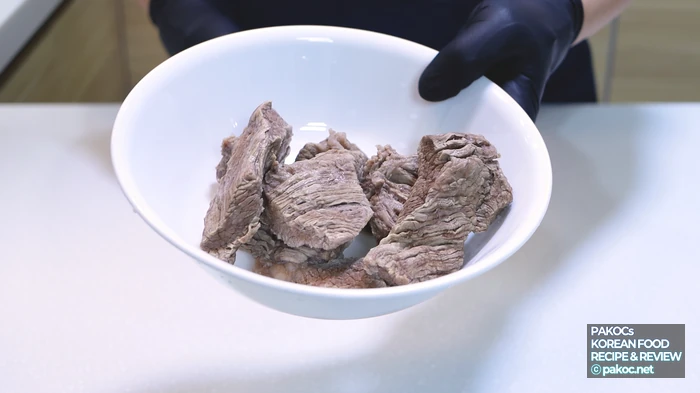
Copyright PAKOC https://pakoc.net | All Rights Reserved Pakoc(http://Pakoc.net)Fish out all the other ingredients, set the beef aside on its own, and let it cool slightly. Strain the finished broth and keep just the liquid! If it’s short, top up with bottled or filtered water to make 1 L.
ⓒ
Copyright PAKOC https://pakoc.net | All Rights Reserved Pakoc(http://Pakoc.net)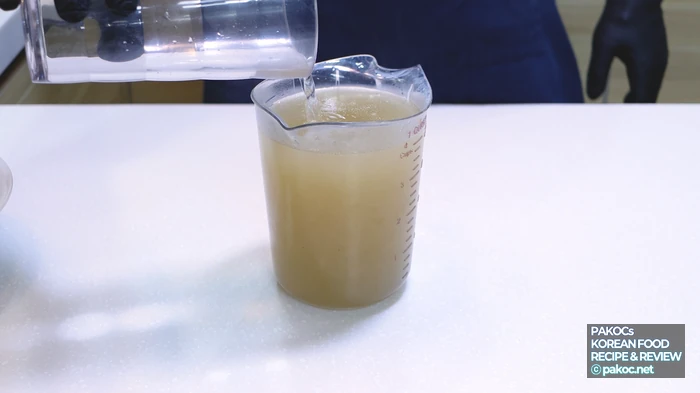
ⓒ
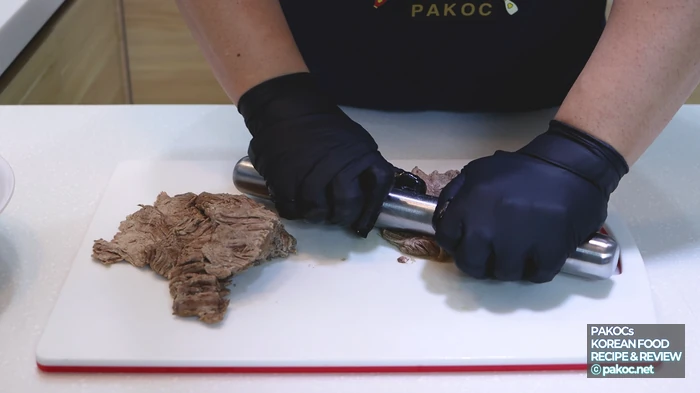
Copyright PAKOC https://pakoc.net | All Rights Reserved Pakoc(http://Pakoc.net)Shred the brisket as fine as you can. It may feel a bit tough at first! If you have a meat mallet you could pound and shred it right away, but since that can be noisy for downstairs neighbors, I recommend pressing the meat with a rolling pin to make it as tender as possible. Then pull it apart little by little along the grain. As a note, it’s best to shred the meat before it fully cools, since it’s hard to shred once too cold.
ⓒ
Copyright PAKOC https://pakoc.net | All Rights Reserved Pakoc(http://Pakoc.net)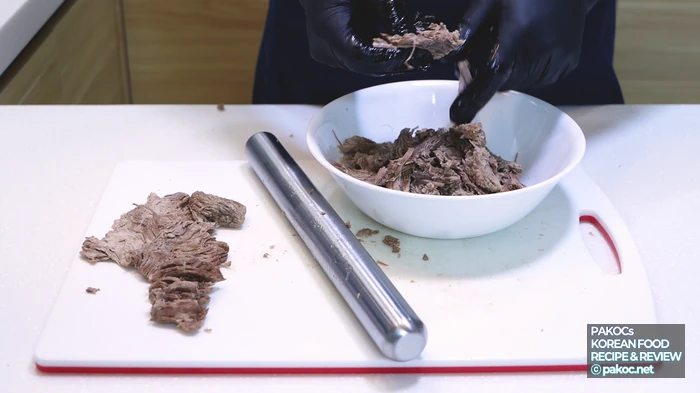
ⓒ
Copyright PAKOC https://pakoc.net | All Rights Reserved Pakoc(http://Pakoc.net)Adding the Seasoning and Braising
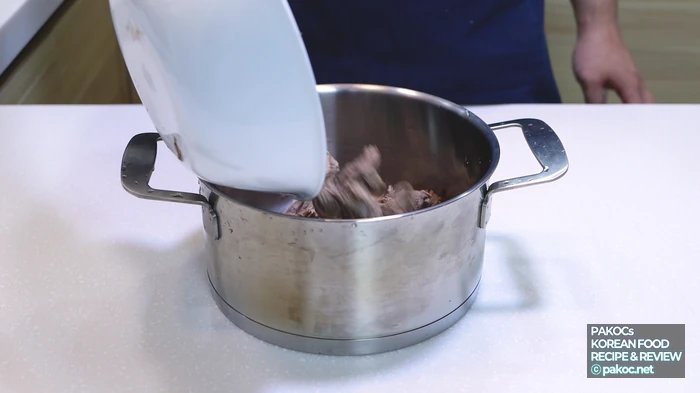
Get a reasonably large pot ready! Add the prepped shishito peppers, the finely shredded beef, 200 g of rinsed peeled quail eggs, and all of the broth to the pot.
ⓒ
Copyright PAKOC https://pakoc.net | All Rights Reserved Pakoc(http://Pakoc.net)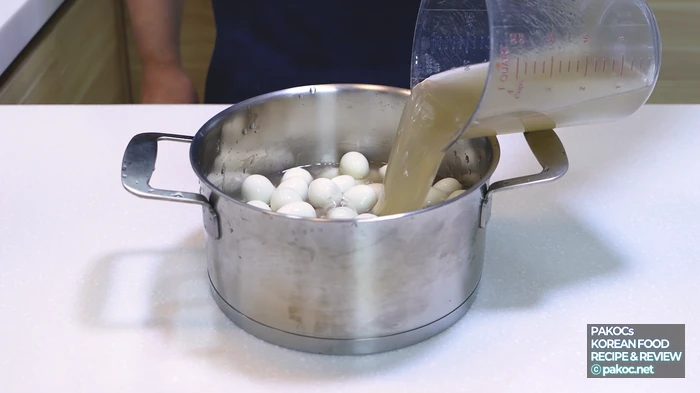
ⓒ
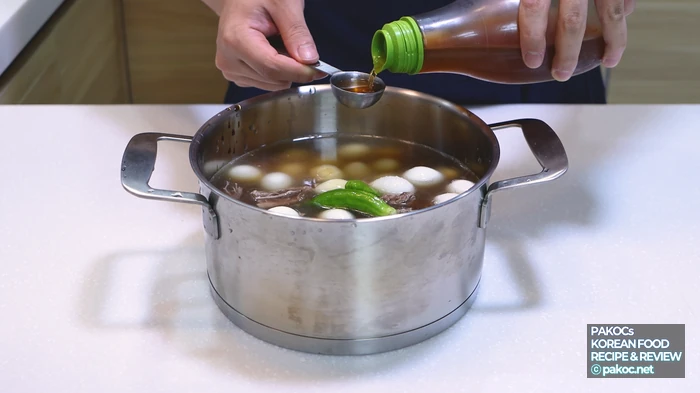
Copyright PAKOC https://pakoc.net | All Rights Reserved Pakoc(http://Pakoc.net)Add 10 Tbsp dark soy sauce (200 ml), 2 Tbsp soup soy sauce, 3 Tbsp sugar, 3 Tbsp cooking wine, 3 Tbsp oligo syrup, and 3 Tbsp cooking water to the pot, then stir it all together well!
ⓒ
Copyright PAKOC https://pakoc.net | All Rights Reserved Pakoc(http://Pakoc.net)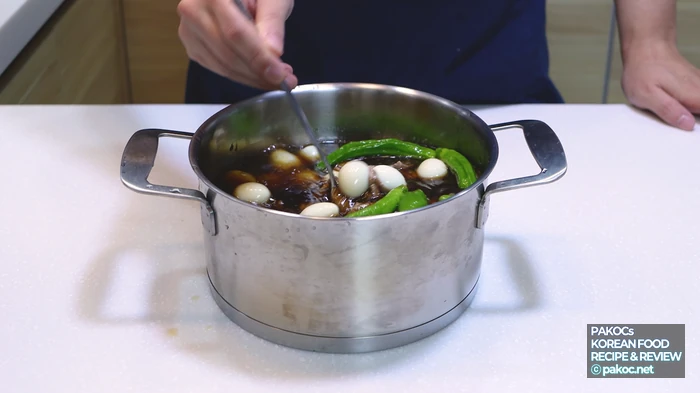
ⓒ


Copyright PAKOC https://pakoc.net | All Rights Reserved Pakoc(http://Pakoc.net)First, bring it to a boil over high heat as is! Once the seasoning starts boiling, lower to medium-low and simmer for another 20–30 minutes. Stir now and then so the seasoning soaks in evenly!
ⓒ
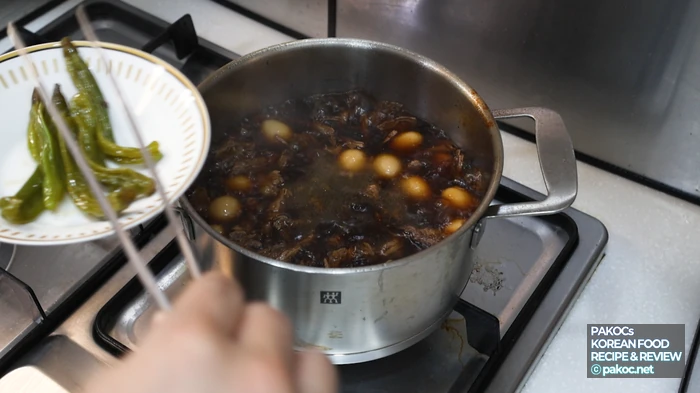
Copyright PAKOC https://pakoc.net | All Rights Reserved Pakoc(http://Pakoc.net)Once the shishito peppers have softened up nicely, fish them out. Around the 20-minute mark, pull out a piece of beef to check whether the seasoning has soaked in well!
ⓒ
Copyright PAKOC https://pakoc.net | All Rights Reserved Pakoc(http://Pakoc.net)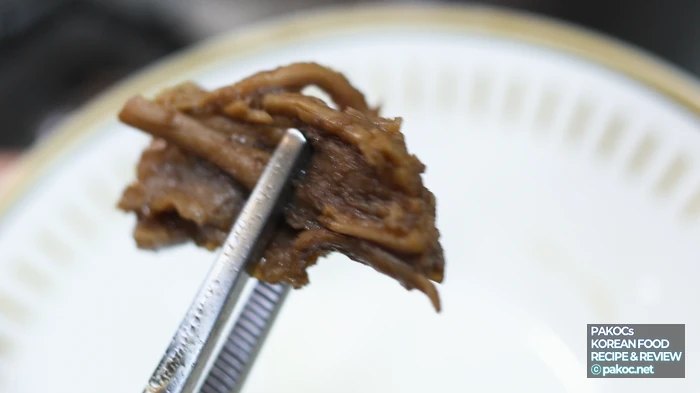
ⓒ
Copyright PAKOC https://pakoc.net | All Rights Reserved Pakoc(http://Pakoc.net)Cook while checking how salty the broth is, whether the quail eggs have taken on the seasoning, and whether the beef has turned nicely tender. If the beef feels a bit tough or the seasoning tastes too salty, add some water and simmer a little longer.
ⓒ
Copyright PAKOC https://pakoc.net | All Rights Reserved Pakoc(http://Pakoc.net)Tender Beef Jangjorim Photo Gallery
ⓒ
Copyright PAKOC https://pakoc.net | All Rights Reserved Pakoc(http://Pakoc.net)
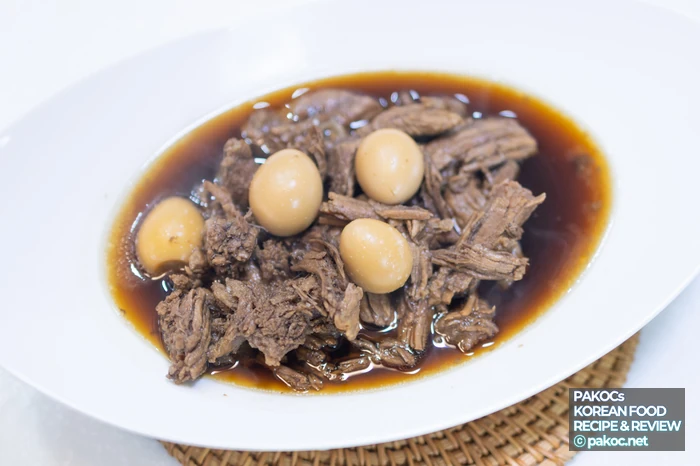
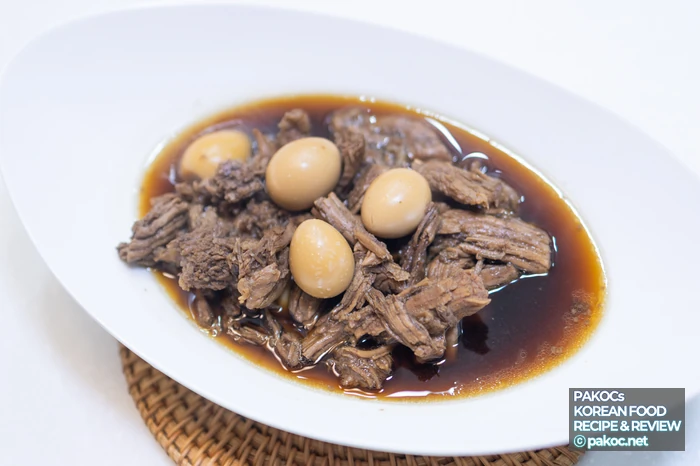
The Finished Tender Beef Jangjorim
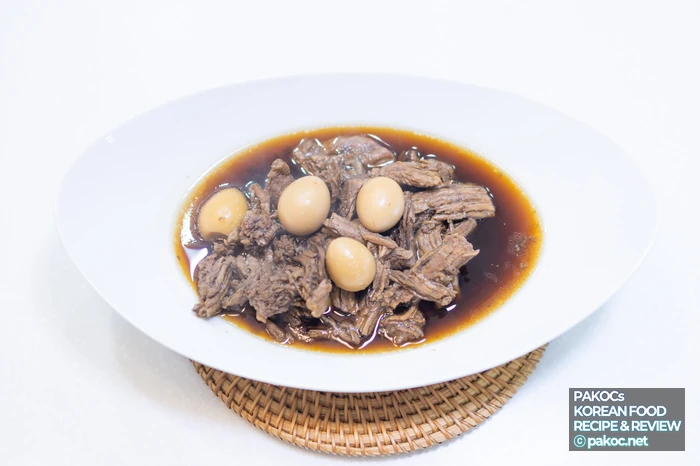
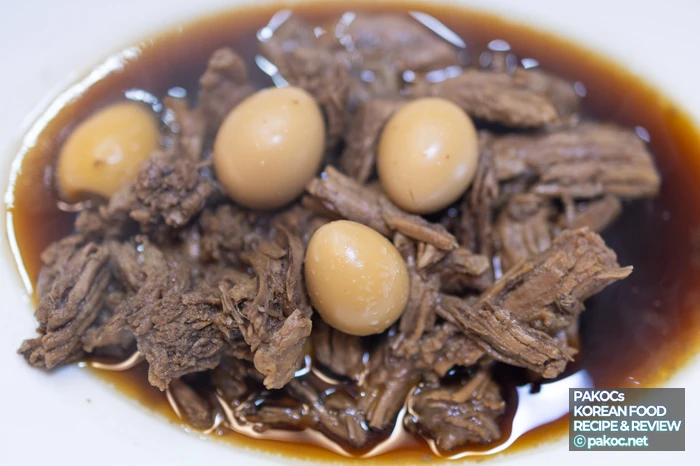
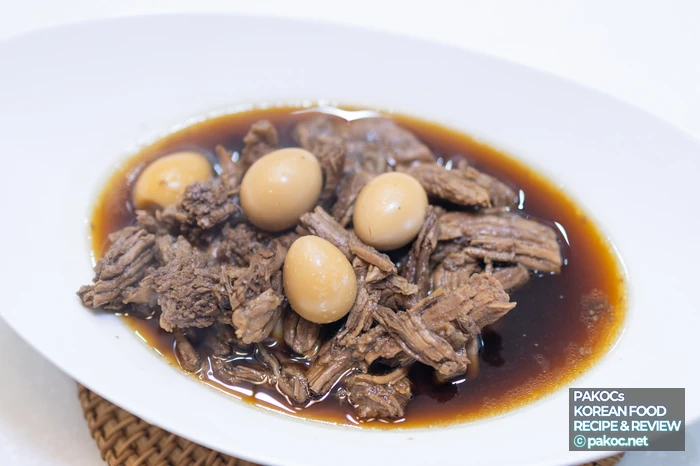
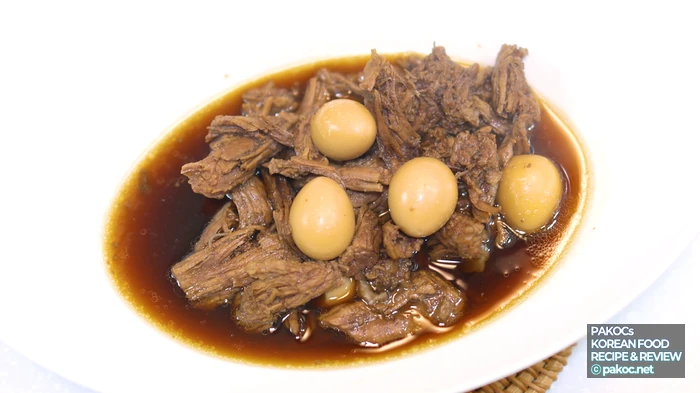
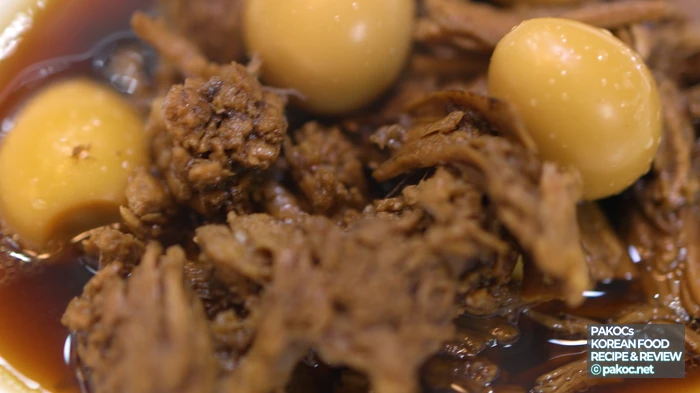
And here’s the finished Tender Beef Jangjorim. It’s a sweet-and-salty rice-stealer through and through! It’s a little like the kind that comes in a pouch or a small side-dish cup, but with a touch less sweetness and a slight kick of heat, which makes it a banchan that pairs wonderfully with home cooking.
ⓒ
Copyright PAKOC https://pakoc.net | All Rights Reserved Pakoc(http://Pakoc.net)
ⓒ
Copyright PAKOC https://pakoc.net | All Rights Reserved Pakoc(http://Pakoc.net)Everyone’s palate is different, so I can’t promise it’ll taste 100% identical, but follow along and you’ll get a very similar flavor. To reproduce that signature softness exactly, shred the beef even finer or use a pressure cooker!
ⓒ
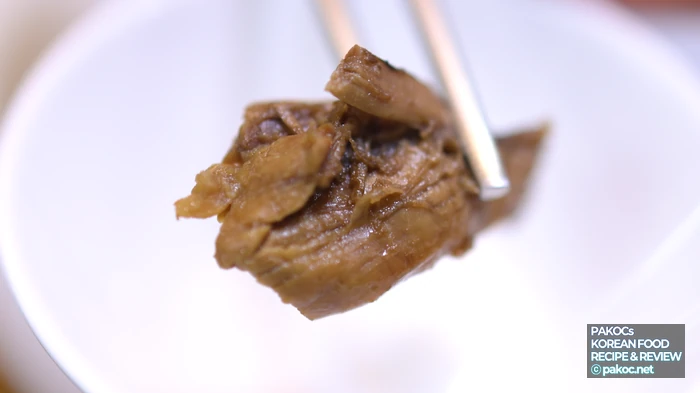
Copyright PAKOC https://pakoc.net | All Rights Reserved Pakoc(http://Pakoc.net)Maybe it’s the pear, but the savory depth really shines through, and the sweet-salty balance feels natural and beautifully soft, never artificial. It’s just right as a banchan that everyone from kids to grown-ups will love. Stirring a pat of butter into this jangjorim and mixing it with rice is fantastic, too! Give it a go at home. The portion is generous, so you’ll be more than satisfied. It’s the kind of taste you won’t regret one bit.
ⓒ
Copyright PAKOC https://pakoc.net | All Rights Reserved Pakoc(http://Pakoc.net)
ⓒ
Copyright PAKOC https://pakoc.net | All Rights Reserved Pakoc(http://Pakoc.net)Jangjorim is a classic Korean side dish made by braising beef or quail eggs in a soy-sauce seasoning, and served with rice it’s a true rice-stealer. For more on this banchan, see the Wikipedia article on jangjorim.
Frequently Asked Questions
Q. What ingredients do I need for beef jangjorim?
The mains are 500 g of beef brisket and 200 g of peeled quail eggs. For the stock you’ll use green onion, garlic, onion, pear, bay leaves, dried kelp, and peppercorns, and the seasoning is dark soy sauce, soup soy sauce, sugar, cooking wine, oligo syrup, and cooking water. Shishito peppers are an optional add-in to taste.
Q. Do I have to add pear?
Pear brings out a sweet, savory depth and makes the beef more tender. If you don’t have one, pear juice or a pear drink can stand in, though it’ll turn out a bit sweeter. For the umami and that soft texture, it’s well worth adding.
Q. What’s the secret to a tender, savory jangjorim?
The keys are shredding the brisket fine along the grain and adding pear for depth. Shred the meat before it fully cools so it comes apart easily, and for extra softness, press it with a rolling pin to loosen the grain or use a pressure cooker. Adjust the sweet-salty balance by topping up with water.
Youtube
image sources
- 간편한 집밥 소고기 장조림: Copyright PAKOC https://pakoc.net | All Rights Reserved Pakoc(http://Pakoc.net)
- 전통 한식 소고기 장조림: Copyright PAKOC https://pakoc.net | All Rights Reserved Pakoc(http://Pakoc.net)
- 육수 내는 소고기 조리법: Copyright PAKOC https://pakoc.net | All Rights Reserved Pakoc(http://Pakoc.net)
- 장조림 재료 소개 사진: Copyright PAKOC https://pakoc.net | All Rights Reserved Pakoc(http://Pakoc.net)
- 간단한 메뉴 소고기 장조림: Copyright PAKOC https://pakoc.net | All Rights Reserved Pakoc(http://Pakoc.net)
- 국간장 사용한 장조림 레시피: Copyright PAKOC https://pakoc.net | All Rights Reserved Pakoc(http://Pakoc.net)
- 여름 시원한 장조림 요리: Copyright PAKOC https://pakoc.net | All Rights Reserved Pakoc(http://Pakoc.net)
- 꼬치 꽈리고추 장조림: Copyright PAKOC https://pakoc.net | All Rights Reserved Pakoc(http://Pakoc.net)
- 소고기 장조림 완성 사진: Copyright PAKOC https://pakoc.net | All Rights Reserved Pakoc(http://Pakoc.net)
- 전문가 추천 소고기 장조림: Copyright PAKOC https://pakoc.net | All Rights Reserved Pakoc(http://Pakoc.net)
- 장조림 고기 조리 과정: Copyright PAKOC https://pakoc.net | All Rights Reserved Pakoc(http://Pakoc.net)
- 자취생을 위한 장조림 레시피: Copyright PAKOC https://pakoc.net | All Rights Reserved Pakoc(http://Pakoc.net)
- 풍부한 맛 장조림 조리법: Copyright PAKOC https://pakoc.net | All Rights Reserved Pakoc(http://Pakoc.net)
- 배 넣은 장조림 특징: Copyright PAKOC https://pakoc.net | All Rights Reserved Pakoc(http://Pakoc.net)
- 소고기 장조림 맛있게 먹는법: Copyright PAKOC https://pakoc.net | All Rights Reserved Pakoc(http://Pakoc.net)
- 장조림 양념 대비 비율: Copyright PAKOC https://pakoc.net | All Rights Reserved Pakoc(http://Pakoc.net)
- 소고기 장조림 조리법: Copyright PAKOC https://pakoc.net | All Rights Reserved Pakoc(http://Pakoc.net)
- 달달한 배 장조림 재료: Copyright PAKOC https://pakoc.net | All Rights Reserved Pakoc(http://Pakoc.net)
- 메추리알 장조림 조리법: Copyright PAKOC https://pakoc.net | All Rights Reserved Pakoc(http://Pakoc.net)
- 편리한 장조림 레시피: Copyright PAKOC https://pakoc.net | All Rights Reserved Pakoc(http://Pakoc.net)
- 가정식 장조림 조리법: Copyright PAKOC https://pakoc.net | All Rights Reserved Pakoc(http://Pakoc.net)
- 부드러운 소고기 장조림: Copyright PAKOC https://pakoc.net | All Rights Reserved Pakoc(http://Pakoc.net)
- 장조림 재료 소개: Copyright PAKOC https://pakoc.net | All Rights Reserved Pakoc(http://Pakoc.net)
- 고기 삶는 시간 팁: Copyright PAKOC https://pakoc.net | All Rights Reserved Pakoc(http://Pakoc.net)
- 장조림 재료 준비과정: Copyright PAKOC https://pakoc.net | All Rights Reserved Pakoc(http://Pakoc.net)
- 최고의 소고기 장조림: Copyright PAKOC https://pakoc.net | All Rights Reserved Pakoc(http://Pakoc.net)
- 고기 조리 시간 안내: Copyright PAKOC https://pakoc.net | All Rights Reserved Pakoc(http://Pakoc.net)
- 부드러운 양지 조리법: Copyright PAKOC https://pakoc.net | All Rights Reserved Pakoc(http://Pakoc.net)
- 집에서 쉽게 장조림: Copyright PAKOC https://pakoc.net | All Rights Reserved Pakoc(http://Pakoc.net)
- 맛있는 밥도둑 장조림: Copyright PAKOC https://pakoc.net | All Rights Reserved Pakoc(http://Pakoc.net)
- 감칠맛 육수 비법: Copyright PAKOC https://pakoc.net | All Rights Reserved Pakoc(http://Pakoc.net)
- 단짠단짠 밥도둑 반찬: Copyright PAKOC https://pakoc.net | All Rights Reserved Pakoc(http://Pakoc.net)